Monday, September 30, 2013
This Tutorial was Written By Me. Any Similarities are Coincidental.
Please do not Claim my Tutorials As Your Own.
These Tutorials are for Everyone to Try.
If you want to post my tuts in your PSP Groups, please post a text link back to this site.
SUPPLIES
I used photoshop cs6 but any version should do.
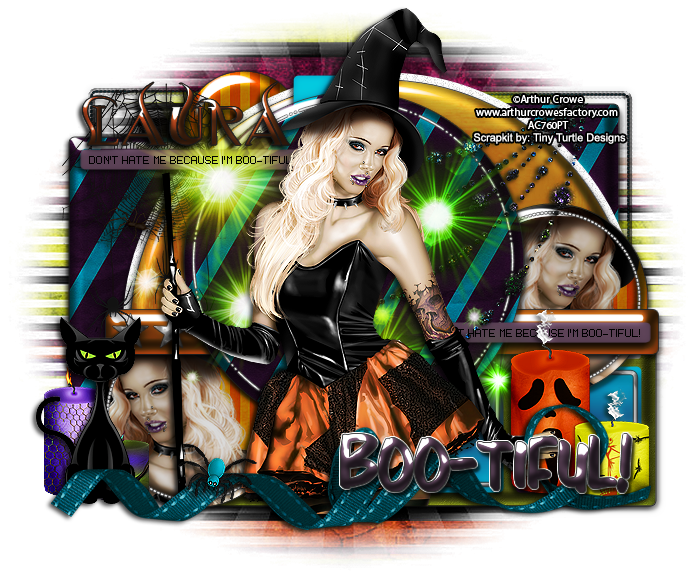
Tube "Magician Babe" by Arthur Crowe
Kit "Boo!" by Tiny Turtle Designs
Template "BOO-TIFUL" by Dangerously Delicious Designz
Mask of choice
Font of choice
Let's get started!
Open template
Apply these papers to the layers listed below.
Use the clipping mask.
ctrl + alt + G
center green circle - Boo! (3)
large orange square - Boo! (3)
green square - Boo! (3)
purple 1/2 circle - Boo! (24)
green strip - Boo! (42)
left blue circle, right blue circle & small blue circle - Boo! (39)
left orange square, right orange square & blue strip - Add gradient of choice.
Once you have the papers as you like Merge them with
the layers you have clipped them to.
Add drop shadows.
Use colors of choice on dotted frames and stars and wordart.
Now open your tube and place over template.
Re-size as desired and sharpen.
Add drop shadow.
Open up a close up and place over right blue circle & left blue circle.
ctrl + alt + G to create clipping mask.
ctrl + alt + G to create clipping mask.
Open Boo! (116)
Place behind your tube in the center.
Open Boo! (53)
Place in the top left corner.
Re-size as desired and sharpen.
Add drop shadow.
Re-size as desired and sharpen.
Add drop shadow.
Open Boo! (9)
Place on the right bottom side of your template.
re-seize as desired and sharpen.
Add drop shadow.
re-seize as desired and sharpen.
Add drop shadow.
Open Boo! (36)
Place on the top right corner.
Re-size and sharpen as desired.
Add drop shadow.
Open Boo! (60)
Place next to your tube on the bottom left.
re-size as desired and sharpen.
re-size as desired and sharpen.
Add drop shadow.
Open Boo! (74)
Re-size and sharpen.
Place on the left bottom side of template.
Add drop shadow.
Open Boo! (12)
Re-size as desired and sharpen.
Place behind Boo! (74)
Add drop shadow.
Add drop shadow.
Open Boo! (49)
Place in the center bottom of your template over your tube
Add drop shadow.
Now Add your mask.
I used Boo! (44) on mine.
Add any effects desired.
I used Xero - Radiance
Settings pictured below

Add your name, copyright, save and you're done!


This is "Ashley" and she is available now at VMT!
For today only 9/30/2013 in celebration of Alex's Birthday she is on sale for $0.90!
so don't miss out on this awesome deal!

Sunday, September 29, 2013
Get this kit now at Tiny Turtle Designs new store.
There are lots of specials going on now so don't miss out!
There are lots of specials going on now so don't miss out!

Tube by Marc Duval

Tube by KiwiFireStorm
Friday, September 27, 2013


Get this beauty and her matching kit now at Racs Store!

Made with matching kit.

Made with another non matching kit.
Thursday, September 26, 2013
This brand new kit "Autumn Moments" from Tiny Turtle Designs
is loaded with everything you need to make the most gorgeous fall kits!

Tube by Verymany

Tube by Alex Prihodko
Wednesday, September 25, 2013
COMING SOON 2013 Fangs!! She has a matching kit and MANY different layers!
Keep an eye out for her and all of the other new beauties Ismael has coming for you!


Monday, September 23, 2013
This new beauty is from Roman Zaric.
She will be in store soon with the matching kit
She will be in store soon with the matching kit
used below in both tags.


Saturday, September 21, 2013
This Tutorial was Written By Me. Any Similarities are Coincidental.
Please do not Claim my Tutorials As Your Own.
These Tutorials are for Everyone to Try.
If you want to post my tuts in your PSP Groups, please post a text link back to this site.

SUPPLIES
I used photoshop cs6 but any version should do.
Tube "Halloween Witch" by Tony T
Kit "Halloween Witch" by Irish Princess Designs
Mask is by Moonbeams & Spiderwebs
Font of choice.
Let's get started!
Open a new canvas 700 x 700
Open Frame2
Place in the center of your canvas.
Add drop shadow.
Open Leaves
Place on the bottom of your frame.
Flip Horizontal.
Add drop shadow.
Open Tree
Place it on the right side of your frame.
Place it behind your frame and erase the edges sticking
outside of the frame.
Add drop shadow.
Open Tree again
Place on the bottom left side of the frame.
Rotate it around until you have it as desired.
Again erase the edges sticking outside of the frame.
Add drop shadow.
Open Log
Place on the bottom right side of your frame.
Re-size as desired and sharpen.
Add drop shadow.
Open Cauldron
Place it on the bottom left side of your frame.
Re-size and sharpen as desired.
Open Spell
Place on the left side of your frame.
Re-size as desired.
Place it over the cauldron and erase around the rim of
the cauldron making it look as if the spell is coming out of it.
Open Moon
Place above spell.
Re-size and sharpen as desired.
Add outer glow.
Open Spider Web
Re-size and sharpen as desired.
Add drop shadow.
Place on the top right corner of your frame.
Open SpellBook
Place at the bottom center of your frame.
Re-size as desired and sharpen.
Add drop shadow.
Open Paper12
Re-size so it fits behind your frame.
Open Familar
Re-size as desired and sharpen.
Place on top of lot and add drop shadow.
Open Candle
Re-size as desired and sharpen.
Place on the right bottom corner of your frame.
Add drop shadow.
Open Clouds
Place at the top of your frame.
Now open your tube and place in the center of the frame.
Size as desired and sharpen.
Add drop shadow.
Now Add your mask.
I used Paper10 on mine.
Add any effects desired.
I used Xero - Porcelain
Settings pictured below

Add your name, copyright, save and you're done!


Friday, September 20, 2013
This kit is full of colorful fun!
"Be Funky" is the new kit from Bookworm Dezines
"Be Funky" is the new kit from Bookworm Dezines
and you can get it now at Scrap Candy.


Thursday, September 19, 2013
We are coming up on breast cancer awareness in october
and Spazz has a new beauty for this special month of awareness.
Find her HERE
Includes layers for Breast,Ovarian,Cervical & Uterine Cancer.
She also has two layers with no ribbons and with pink or no pink hair!
You can also get "Cancer Awareness 2"
Extended Series for bone, lung, liver, colon, prostate and general cancer HERE


This sexy thing is "Lady Pumpkin 5" and she is coming soon
with matching kit to xeracx!

Tag below was NOT made with matching kit.

Wednesday, September 18, 2013
This awesome new kit is "A Chilling Night" from Jackie's Jewels.
Perfect for all of your dark and creepy tagging pleasure!
Get it HERE
Perfect for all of your dark and creepy tagging pleasure!
Get it HERE


This Tutorial was Written By Me. Any Similarities are Coincidental.
Please do not Claim my Tutorials As Your Own.
These Tutorials are for Everyone to Try.
If you want to post my tuts in your PSP Groups, please post a text link back to this site.

SUPPLIES
I used photoshop cs6 but any version should do.
Tube "Pink Fairy" by The Hunter
Kit "Mega Pinktastic Kit" by Tiny Turtle Designs
Let's get started!
Open template
Apply these papers to the layers listed below.
Use the clipping mask.
ctrl + alt + G
Shape 3 - Mega Pinktastic Kit (9)
Shape 1 & 2 - Mega Pinktastic Kit (8)
Shape 4 - Mega Pinktastic Kit (37)
Once you have the papers as you like Merge them with
the layers you have clipped them to.
Add drop shadows.
Go into blending mode on swirls.
Color overlay with a pink of choice from your kit.
change blend mode to color.
Add drop shadow.
Add a color of choice to text.
Now open your tube and place over template.
Re-size as desired and sharpen.
Add drop shadow.
Open Mega Pinktastic Kit (68)
Re-size as desired and sharpen.
Add drop shadow
Open Mega Pinktastic Kit (83)
Place in the center of your template.
Flip horizontal.
Open Mega Pinktastic Kit (89)
Place on the left side of your template.
Re-size as desired and sharpen.
Add slight drop shadow.
Open Mega Pinktastic Kit (120)
Re-size and sharpen as desired.
Add drop shadow.
Place as desired on the tag.
Open Mega Pinktastic Kit (202)
Place over your tube.
Open Mega Pinktastic Kit (254)
Re-size and sharpen.
Place on the left side of template.
Open Mega Pinktastic Kit (258)
Re-size as desired and sharpen.
Place over the bottom right side of template.
Open Mega Pinktastic Kit (270)
Re-size as desired and sharpen.
Place in the center of your template
behind your tube.
Open Mega Pinktastic Kit (267)
Re-size as desired and sharpen.
Place on the bottom right side of template.
Open Mega Pinktastic Kit (291)
Place behind and under your tube.
Make it look as though she is sitting on it.
Now Add your mask.
I used Mega Pinktastic Kit (41) on mine.
I duplicated and placed one on the bottom left
and top right sides of the template.
Add any effects desired.
I used Xero - Porcelain
Settings pictured below

Add your name, copyright, save and you're done!
This tag features "The Nightmare Isn't Over" by Rissa's Designs.
You can check it out along with everything else she has to offer
You can check it out along with everything else she has to offer
at Scrap Candy!


Tuesday, September 17, 2013
I made these tags with the awesome new kit "Frankenstein Kisses" from Irish Princess Designs! Come on by Scrap Candy and pick it up now!


Sunday, September 15, 2013
This Tutorial was Written By Me. Any Similarities are Coincidental.
Please do not Claim my Tutorials As Your Own.
These Tutorials are for Everyone to Try.
If you want to post my tuts in your PSP Groups, please post a text link back to this site.

SUPPLIES
I used photoshop cs6 but any version should do.
Tube "Sunny" by Grafik
Kit "A Day of Harvest" by Jackie's Jewels
Font of choice
Mask of choice
Let's get started!
Open a new canvas size 800 x 800
Open Frame2
Place in the center of your new canvas.
Add drop shadow.
Now open your tube and place at the bottom front of the frame.
Add drop shadow.
Open Paper5
Place behind your frame.
Erase outer edges.
Open Autumn
Place over you paper background.
Underneath the top left side of your frame.
Rotate down slightly to the left.
Add drop shadow.
Open Mask
Place behind Autumn word art.
Open Branch2
Place in the front of frame at the far left corner.
Add drop shadow.
Now duplicate and place on the far right corner.
Size down slightly and sharpen.
Add drop shadow.
Now duplicate and place on the far right corner.
Size down slightly and sharpen.
Duplicate original again and place over the top of frame2.
Open WagonWheel
Place in front of Branch 2.
Re-size as desired and sharpen.
Add drop shadow.
Re-size as desired and sharpen.
Add drop shadow.
Open GrassPatch
Place as your bottom layer.
Duplicate and place under your tube.
Just move them around until you have
Duplicate and place under your tube.
Just move them around until you have
them looking the way you want.
Open Pumpkins
Place on the far bottom right of your frame.
Re-size as desired and sharpen.
Add drop shadow.
Re-size as desired and sharpen.
Add drop shadow.
Open Leaf2 & Leaf3
Re-size as desired and sharpen.
Place behind the Pumpkins so that
Place behind the Pumpkins so that
they are peaking out above.
Add drop shadows.
Add drop shadows.
Open Mushrooms1
Re-size as desired and sharpen.
Place in front of wagon wheel.
Place in front of wagon wheel.
add drop shadow.
Open Ladder
Place on the far right corner behind Branch2
Add drop shadow.
Open Snail
Re-size as desired and sharpen.
Place on top of wagon wheel.
Add drop shadow.
Place on top of wagon wheel.
Add drop shadow.
Open Squirell
Place on the second to top step.
Re-size as desired and sharpen.
Add drop shadow.
Re-size as desired and sharpen.
Add drop shadow.
Now add mask of choice.
Add any effects desired.
I used Xero - Radiance
Settings pictured below

Add your name, copyright, save and you're done!
This Tutorial was Written By Me. Any Similarities are Coincidental.
Please do not Claim my Tutorials As Your Own.
These Tutorials are for Everyone to Try.
If you want to post my tuts in your PSP Groups, please post a text link back to this site.

SUPPLIES
I used photoshop cs6 but any version should do.
Tube "Wonderful Babe" by Arthur Crowe
Kit "Alice" by Tiny Turtle Designs
Font of choice
Let's get started!
Open a new canvas size 800 x 800
Place template on the new Canvas.
Apply these papers to the layers listed below.
Use the clipping mask.
ctrl + alt + G
1 - Alice (20)
2 - Alice (24)
3 - Alice (19)
5 - Alice (21)
7 - Alice (25) - Rotate 90
8 - Alice (24)
9 - Alice (24)
10 - Alice (29)
Once you have the papers as you like Merge them with
the layers you have clipped them to.
Add drop shadows.
Now add a style of choice to layers
4, 6, 11, 12, 13, 14, 15 & 16
Now open your tube and place over template.
Re-size as desired and sharpen.
Add drop shadow.
Open Alice (161)
Place in the bottom right corner of
the template behind layer 2.
Rotate as desired and add drop shadow.
Rotate as desired and add drop shadow.
Open Alice (158)
and do the same in the top left corner
Open Alice (157)
Place in the front bottom of your tag.
Duplicate and mirror.
Open Alice (166)
Place on the bottom right side.
Open Alice (165)
Place on the bottom left side.
Duplicate and place on the bottom right side.
Re-size so it's smaller and sharpen.
Place behind Alice (166)
Add drop shadow.
Open Alice (145)
Duplicate and put one each
on the bottom left and right.
Add drop shadows.
Re-size if desired.
Open Alice (154)
Re-size to about 45% and sharpen.
Add drop shadow.
Add drop shadow.
Place on the bottom left side.
Open Alice (162)
Re-size to about 50% and sharpen.
Place behind Alice (154) - The bottle.
Flip horizontal and add drop shadow.
Open Alice (118)
Re-size to 30% and sharpen.
Place on the far bottom right of your tag.
Add drop shadow.
Open Alice (114)
Place behind layer 2 and duplicate.
Place on on the top right corner
and one at the bottom left SIDE.
Add drop shadows.
Open Alice (141)
Place behind you tube and
add drop shadow.
Open Alice (187)
Duplicate and place one
on either side of template.
Add drop shadow.
It gives a nice shine effect.
Now add mask of choice.
Add any effects desired.
I used Xero - Radiance
Settings pictured below

Add your name, copyright, save and you're done!
Saturday, September 14, 2013
This Tutorial was Written By Me. Any Similarities are Coincidental.
Please do not Claim my Tutorials As Your Own.
These Tutorials are for Everyone to Try.
If you want to post my tuts in your PSP Groups, please post a text link back to this site.

SUPPLIES
I used photoshop cs6 but any version should do.
Tube "Tiffany" by Lady Mishka
Font of choice
Filter of choice
Mask of choice
Mask of choice
Let's get started!
Open a new canvas size 800 x 800
Apply these papers to the layers listed below.
Use the clipping mask.
ctrl + alt + G
orange square - BD-Paper3
purple circle - BD-Paper12
left green circle & right green circle - BD-Paper7
blue oval - BD-Paper3
orange rectangle - BD-Paper12
green square - BD-Paper14
Once you have the papers as you like Merge them with
the layers you have clipped them to.
Add drop shadows.
Now open your tube and place over template.
Re-size as desired and sharpen.
Add drop shadow.
Open BD-Element45
Place in the center of
your new canvas.
Open BD-Element15
Place on the bottom right side of your temp.
Rotate slightly right and add drop shadow.
Re-size and sharpen as desired.
Rotate slightly right and add drop shadow.
Re-size and sharpen as desired.
Open BD-Element14
Place in front of element15.
Re-size as desired and sharpen.
Add drop shadow.
Re-size as desired and sharpen.
Add drop shadow.
Open BD-Element26
Place at the top center.
Re-size as desired and sharpen.
Add drop shadow.
Add drop shadow.
Open BD-Element30
Place next to element 26.
Re-size as desired and sharpen.
Re-size as desired and sharpen.
Add drop shadow.
Open BD-Element29
Place in front of your tube.
Re-size as desired and sharpen.
Add drop shadow.
Re-size as desired and sharpen.
Add drop shadow.
Add any effects desired.
I used clear styles over the papers applied to the template.
It gives a nice shine effect.
Now add mask of choice.
I used clear styles over the papers applied to the template.
It gives a nice shine effect.
Now add mask of choice.
Add your name, copyright, save and you're done!
This Tutorial was Written By Me. Any Similarities are Coincidental.
Please do not Claim my Tutorials As Your Own.
These Tutorials are for Everyone to Try.
If you want to post my tuts in your PSP Groups, please post a text link back to this site.

SUPPLIES
I used photoshop cs6 but any version should do.
Tube "Dark Goddess" by Arthur Crowe
Kit "Camp Crystal Lake" by Kizzed by Kelz
Font of choice
Filter of choice
Let's get started!
Open a new canvas size 800 x 800
Open frame 2
Place in the center of
your new canvas.
Add drop shadow
Open eerie mist
Place behind the frame
Open Paper 12
Place behind the mist.
Erase edges outside of frame.
Erase edges outside of frame.
Open bloody blade
Place on the bottom left corner.
Re-size as desired and sharpen.
Add drop shadow.
Duplicate and place on top right corner.
Add drop shadow.
Duplicate and place on top right corner.
Open moon
Place at top center of your frame.
Re-size as desired and sharpen.
Re-size as desired and sharpen.
Open sign
Place on the bottom left side of your frame
Behind Bloody Blade.
Re-size as desired and sharpen.
Add drop shadow.
Behind Bloody Blade.
Re-size as desired and sharpen.
Add drop shadow.
Open skull sparkles
Place at the back of your tag as mask.
Duplicate as desired and spread them around.
Duplicate as desired and spread them around.
Add drop shadow.
Open wordart 1
Place on the bottom of frame.
Add drop shadow.
Open wood
Place behind Wordart 1.
Add drop shadow.
Now open your tube and place as desired.
Add drop shadow.
Add drop shadow.
Open wood
Place behind Wordart 1.
Add drop shadow.
Now open your tube and place as desired.
Add drop shadow.
Add any effects desired.
Add your name, copyright, save and you're done!
Friday, September 13, 2013
This Tutorial was Written By Me. Any Similarities are Coincidental.
Please do not Claim my Tutorials As Your Own.
These Tutorials are for Everyone to Try.
If you want to post my tuts in your PSP Groups, please post a text link back to this site.

SUPPLIES
I used photoshop cs6 but any version should do.
Tube "My Lady Red" by Arthur Crowe
Kit "My Lady Red" by Creation by Sanie
Font of choice
Filter of choice
Let's get started!
Open a new canvas size 800 x 800
Open AC-MLR-Frame02
Place in the center of
your new canvas.
Add drop shadow
Open AC-MLR-Rose04
Place on the left side of frame
Re-size as desired and sharpen.
Add drop shadow.
Add drop shadow.
Open AC-MLR-Ribbon01
Place on the left bottom part of frame.
Add drop shadow.
Open AC-MLR-VampireLips
Place in the center of your ribbon.
Re-size as desired and sharpen.
Add drop shadow.
Add drop shadow.
Open AC-MLR-Rose01
Place at top right corner of your frame.
Re-size as desired and sharpen.
Add drop shadow.
Re-size as desired and sharpen.
Add drop shadow.
Open AC-MLR-Spider
Place on the top right side of frame.
Re-size as desired and sharpen.
Add drop shadow.
Re-size as desired and sharpen.
Add drop shadow.
Open AC-MLR-Wings02
Place behind fangs giving it the illusion
of having wings.
Add drop shadow.
Add drop shadow.
Open your full tube and place as desired.
Re-size and sharpen.
Add drop shadow.
Re-size and sharpen.
Add drop shadow.
Open AC-MLR-p05
Place behind frame and re-size
so that it all fits behind frame and only
shows in the center.
Now open close up of tube and place over p05.
Change blending mode to Luminosity
and change opacity to 60%
Add any effects desired.
Add your name, copyright, save and you're done!
Thursday, September 12, 2013
This sexy kitten is available now at SpazzdArt
I paired her with the matching kit "Pussy Cat, Pussy Cat" from Kissing Kate

This stunning kit has 30 Papers and 125 elements!
You just have endless design options.
You just have endless design options.
Find this beauty and more HERE


Subscribe to:
Posts
(Atom)


Where I sell!


