Tuesday, September 10, 2013
This Tutorial was Written By Me. Any Similarities are Coincidental.
Please do not Claim my Tutorials As Your Own.
These Tutorials are for Everyone to Try.
If you want to post my tuts in your PSP Groups, please post a text link back to this site.

Items you will need to follow this tutorial.
Photoshop cs6
The beautiful artwork "Kawaii Cutie" by Ninaste
The kit "Summer Fantasy Kit" by Tiny Turtle Designs
Now lets get started!
Open a new canvas 900 x 800
and place the template on it.
Open a new canvas 900 x 800
and place the template on it.
Place Coralie (45) over Shape 3.
hit ctrl + alt + G to create a clipping mask.
Layer> Merge Down.
Add drop shadow.
Open Fairy Magic (28) and duplicate.
Place original over shape 1
hit ctrl + alt + G to create a clipping mask.
Layer> Merge Down.
Repeat with the duplicate on shape 2.
Go into your blending options
and add an inner shadow to both shape 1 and 2
using the settings pictured below.

Now add Fairy Magic (23)
To the bottom layers named swirls.
hit ctrl + alt + G to create a clipping mask.
Layer> Merge Down.
Add a drop shadow
I used the settings but upped the
Opacity to 100%
Open Coralie (92)
Place over shape 4 and
hit ctrl + alt + G to create a clipping mask.
Layer> Merge Down.
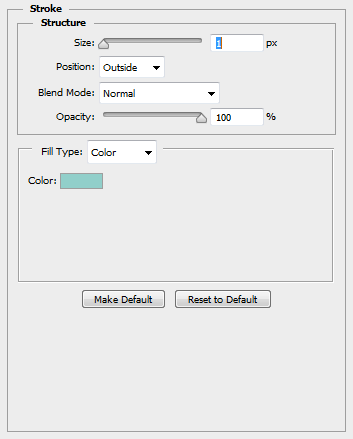
Add a drop shadow and stroke using the settings
pictured below.

Open coralie (86)
place under the template wordart
re-size to 75% and sharpen.
Add drop shadow.
Open coralie (91)
Place above shape 1 on the left side
and duplicate.
Place duplicated element on the right side
of your template above shape 2
Flip Horizontal>Flip Vertical.
On shape3 using the settings pictured
below add a dark outer glow

Now open up the tubes close up.
Re-size if desired and place over shape 3.
hit ctrl + alt + G to create a clipping mask.
Add a small drop shadow to your close up.
Now add a color of choice to
the template text art.
I used a dark purple to play off the colors
on the tube art.
Add a drop shadow to your stroke text art.
Now that you have the main body of the tag done
it is time to add your elements.
Open
Coralie (56)
Coralie (72)
Coralie (69)
Fairy Magic (8)
Moonlight Fantasy (56)
Moonlight Fantasy (68)
Moonlight Fantasy (78)
Coralie (79)
Now using these elements size to various sizes and
place around the center where your tube
is placed.
Now add your mask and place Coralie (44)
over it and hit ctrl + alt + G to create a clipping mask.
Layer> Merge Down.
Now make sure to place your copyrights so that they are
Clear and visible.
I wrote this tutorial in photoshop CS6 but with the finished product
I did go into PSP and added the filter
Xero>Porcelain
The settings I used are pictured below.

Thank you so much for following along!
I would love to see your creations.
Subscribe to:
Post Comments
(Atom)


Where I sell!


0 comments:
Post a Comment